
Step-by-Step Guide to Laser Cut Acrylic Signs
Laser Cutting and Acrylic Sign
STEP BY STEP GUIDE TO CREATING LASER CUT ACRYLIC SIGNS
Creating custom acrylic signs with a laser cutter is an excellent way to achieve professional-quality results. In this guide, we’ll walk you through the process of designing and cutting an acrylic sign for "Hibachi Kings." Follow these steps to ensure your project turns out perfectly.
Step 1: Create Your Vector Artwork
Designing the Logo
Start by creating a vector version of the Hibachi Kings logo. Use software like Adobe Illustrator or CorelDRAW to design your artwork. Ensure your design includes mounting points for easy installation later.
Keywords: vector artwork, logo design, Adobe Illustrator, CorelDRAW, mounting points
Tips:
- High Contrast: Ensure your logo has clear, high-contrast lines for clean cuts.
- Include Mounting Points: Add small holes or slots in the design where screws or other mounting hardware can be inserted.
Step 2: Convert Vector to Laser Software
Using LightBurn
Once your vector design is ready, import it into LightBurn software. LightBurn allows you to assign specific power and speed settings to your laser cutter.
Keywords: LightBurn software, laser cutter settings, power and speed settings
Tips:
- Material Settings: Acrylic requires different settings than other materials. Experiment with power and speed settings to find the optimal configuration for your specific laser cutter.
- File Formats: Ensure your vector file is saved in a compatible format like SVG or DXF before importing.
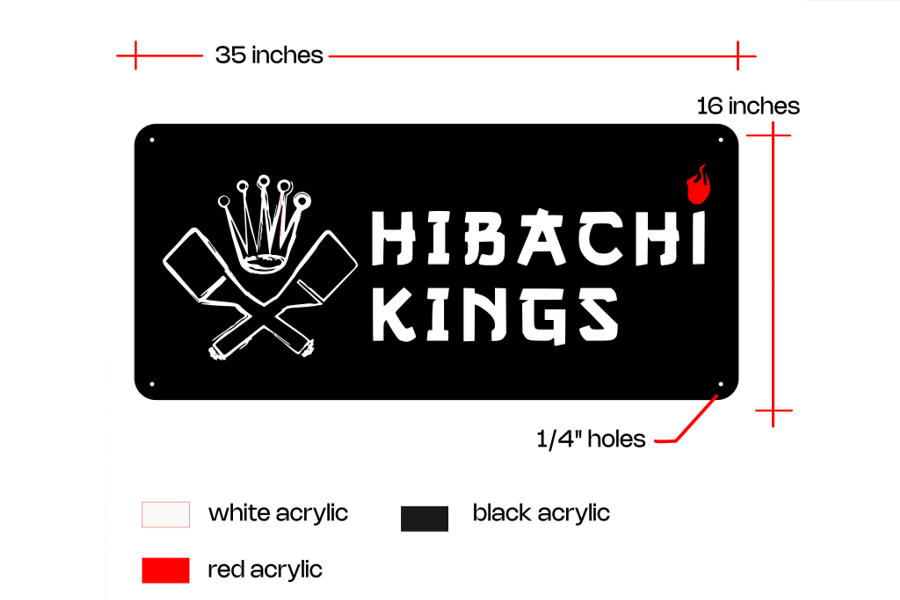
Vector file preparation for Laser cutting acrylic signs
Step 3: Prepare Your Materials
Applying Double-Sided Tape
Before cutting, apply industrial-strength double-sided tape to the back of the acrylic pieces. This will make assembly easier.
Keywords: prepare materials, double-sided tape, industrial strength, acrylic pieces
Tips:
- Clean Surface: Ensure the acrylic surface is clean before applying the tape to ensure strong adhesion.
- Uniform Application: Apply the tape evenly to avoid air bubbles and ensure consistent sticking.
Step 4: Laser Cutting
Setting Up and Cutting
Set your laser cutter to the appropriate settings for acrylic. For this project, we used 42% power and 12mm/sec speed, but these settings can vary.
Keywords: laser cutting, acrylic settings, laser cutter power and speed
Tips:
- Test Cuts: Perform a few test cuts on scrap material to fine-tune the settings.
- Safety First: Always wear safety goggles and ensure proper ventilation when operating the laser cutter.
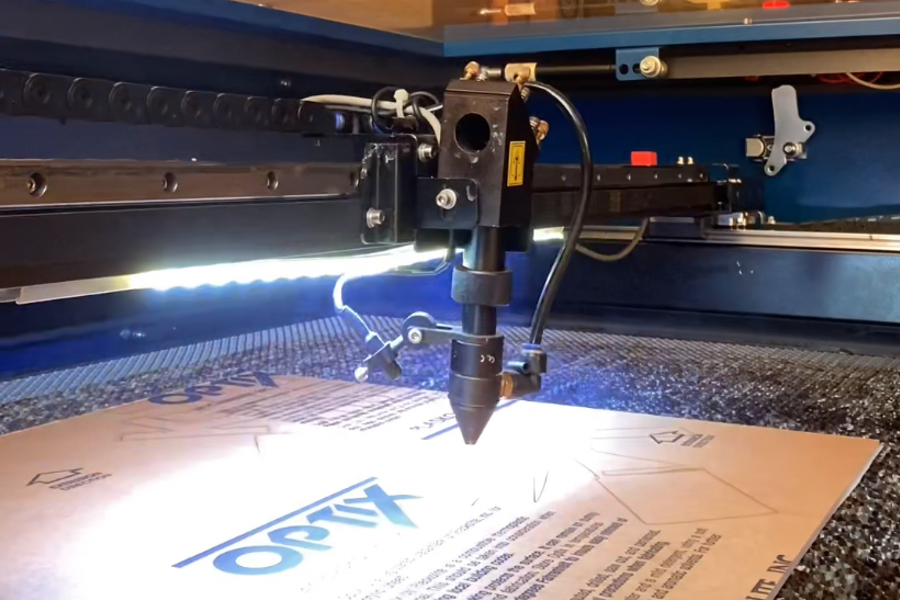
Laser Cutting Acrylic Signs
Step 5: Assembly
Putting It Together
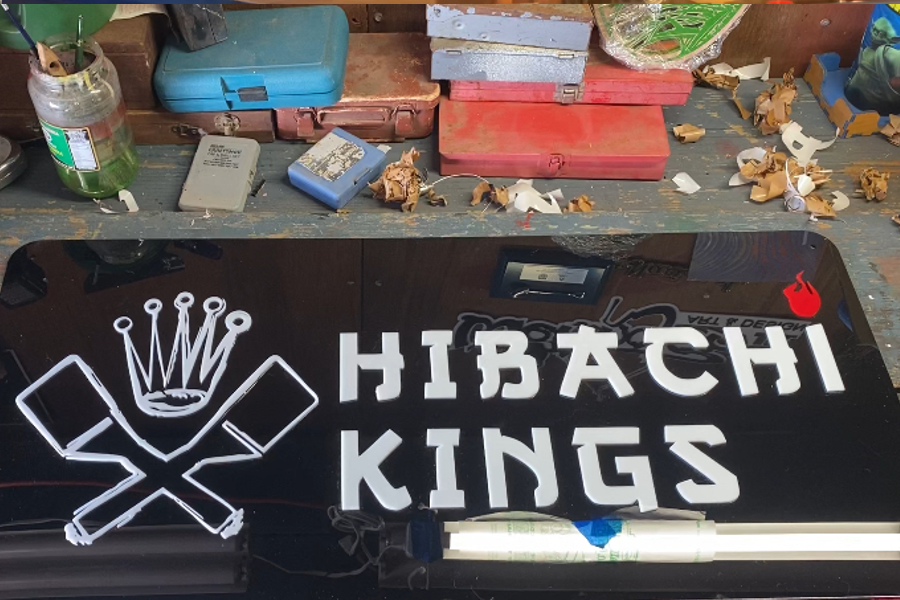
Once the pieces are cut, assembly is straightforward thanks to the double-sided tape. Simply peel off the backing and stick the white and red acrylic pieces onto the black backing plate.
Keywords: assembly, peel and stick, double-sided tape, backing plate
Tips:
- Alignment: Carefully align each piece before sticking to ensure a professional look.
- Pressure: Apply even pressure to ensure the pieces adhere firmly.
Step 6: Mount and Enjoy
Final Installation
With your sign assembled, it's time to mount it. Use the mounting points created in step 1 to securely attach your sign to the desired location.
Keywords: mount sign, final installation, secure attachment
Tips:
- Level Installation: Use a level to ensure your sign is perfectly straight.
- Secure Fastening: Ensure all mounting hardware is tightly secured to prevent the sign from falling.
By following these steps, you'll create a stunning acrylic sign for Hibachi Kings that looks professional and is built to last. Remember to experiment with settings and materials to find what works best for your specific laser cutter.