
The Ultimate Beginners Guide to Setting up your First Laser Cutter
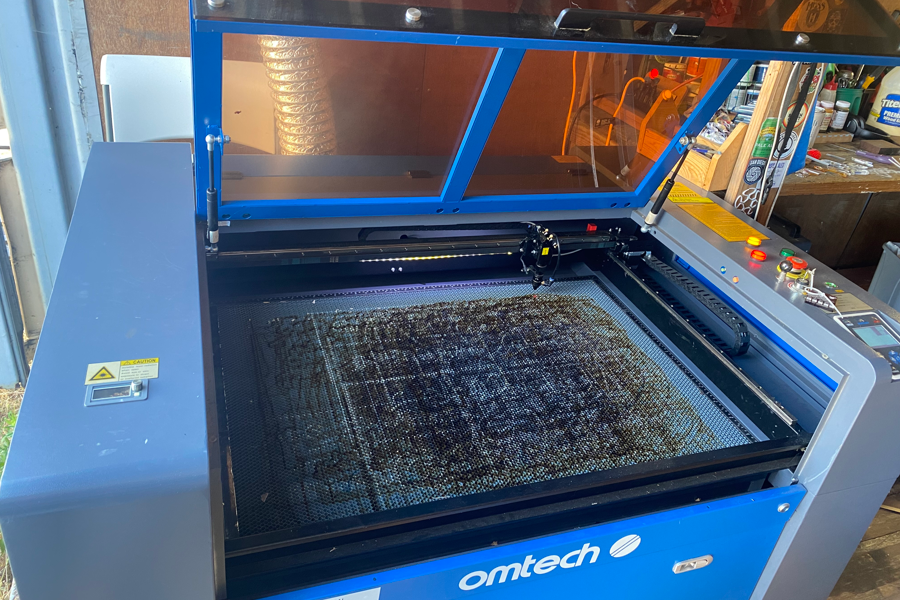
Omtech 100 watt Laser Cutter
THE ULTIMATE BEGINNERS GUIDE TO SETTING UP YOUR LASER CUTTER ENGRAVER
Setting up your first laser cutting machine can be an exciting yet daunting task. This guide will walk you through the steps from unboxing to maintenance, ensuring a smooth start to your laser cutting journey.
Unboxing and Assembling
- Unboxing: Carefully open the packaging, ensuring all components are present. Typical contents include the laser machine, power supply, software, user manual, and any accessories such as a water chiller or air purifier. In the case of my Omtech laser I had to buy some of the components separate from the actual laser. There is also lots of miscellaneous parts needed like electrical tape, flexible and rigid duct work for smoke evacuation, a level, 90% isopropyl alcohol, clamps and many other items.
- Positioning: Place your machine on a stable, level surface in a well-ventilated area. Ensure there is enough space around the machine for operation and maintenance. Something that you may not think of before purchasing your laser is the clearance you need to access the internal components of your laser.
- Electrical Setup: Connect the machine to a dedicated power outlet. Ensure the voltage matches the machine’s requirements to avoid any electrical issues. Provide a ground directly to your machine. I must recommend that you have a qualified installer make sure your electrical connections are correct for safe operation. I put in an 8 foot ground rod connected directly to my laser so I have a permanent path to ground.
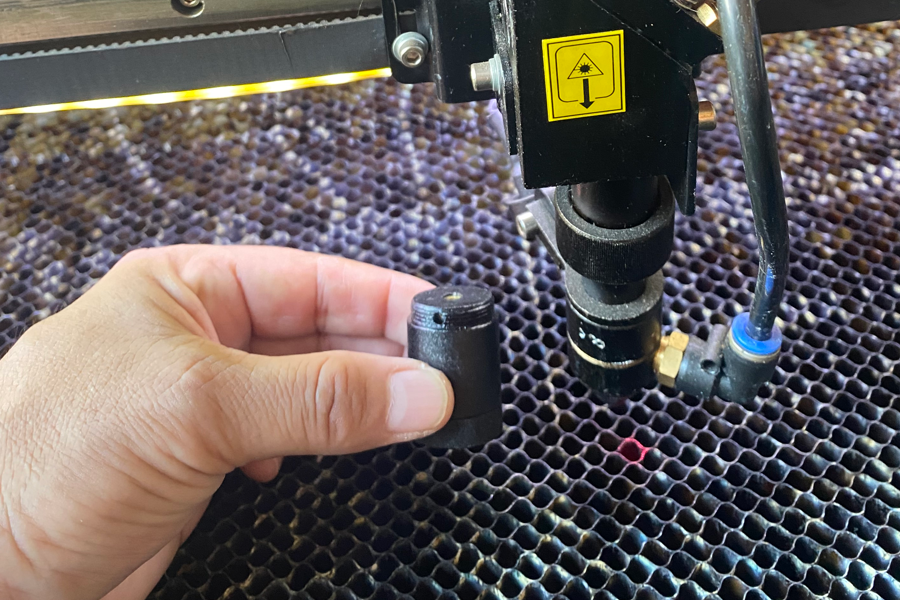
Laser Cutter alignment device
Calibration and Alignment
- Initial Calibration: Power on the machine and follow the user manual for initial calibration. This process ensures the laser head and bed are properly aligned. make sure the motors to raise and lower the bed are aligned giving you a level surface to your laser bed.
- Laser Head Alignment: Adjust the laser head so that it is perpendicular to the bed. Use alignment tools provided or purchase a laser alignment tool for precise adjustments. Misalignment can lead to poor cutting quality and potential damage to the machine. The first time going through this process may be frustrating but make sure you are patient on this step. Make sure you are familiar with how the mirror alignment adjustments are made, you may fine this information in your user manual that came with your machine.
- Focus Adjustment: Adjust the focus of the laser according to the material thickness you plan to cut. Many machines come with an auto-focus feature, but manual adjustments might be necessary for precise work. The best way to find your exact focal length is to score a line on a piece of wood that is slanted on your laser bed. This will give you a more precise focal adjustment. Use this length to laser cut your alignment tools.
Software Installation
- Install Software: Install the provided software, such as LightBurn, on your computer. This software allows you to create and upload designs to the laser cutter. I use LightBurn in a limited capacity when doing my laser creations. I create most of my vectors in CAD or another helpful software I use is Inkscape, which is a free crowd funded software that can be a powerful tool for your laser creations and a great substitute to illustrator.
- Driver Installation: Ensure all necessary drivers are installed for seamless communication between your computer and the laser cutter.
- Design Setup: Import your design files into the software and adjust the parameters like speed, power, and number of passes according to the material. I would recommend having a settings book when freshly starting off, this will help you learn how much power and speed you need to assign to the laser in order to cut different types of materials.
Safety Precautions
- Ventilation: Ensure proper ventilation to remove fumes and particles generated during laser cutting. Use an inline duct fan or an air purifier to maintain air quality. The locations and mounting of your in-line fan, duct work and air purifier is another consideration you should make before purchasing your laser cutter.
- Protective Gear: Always wear appropriate protective gear, such as safety glasses, to protect against laser exposure.
- Fire Safety: Keep a fire extinguisher nearby and never leave the machine unattended while in operation.
Maintenance Tips
- Cleaning: Regularly clean the laser head, mirrors, and lenses with appropriate cleaning solutions to ensure optimal performance. Dust and residue can affect laser efficiency and cutting quality. Check for the recommended cleaning solutions and write them down in your laser book.
- Water Chiller Maintenance: If your machine uses a water chiller, regularly check and replace the water to prevent overheating. Ensure the water is clean and free from debris. I use distilled water to make sure there aren't to many minerals going through my laser system which will build up over time.
- Lubrication: Lubricate moving parts as per the manufacturer’s recommendations to prevent wear and tear. I use an approved cleaning solutions and regularly grease all the moving components.
- Software Updates: Keep your software and firmware up-to-date to benefit from the latest features and improvements. try to update all the software you use at one time to make sure everything is up to date.
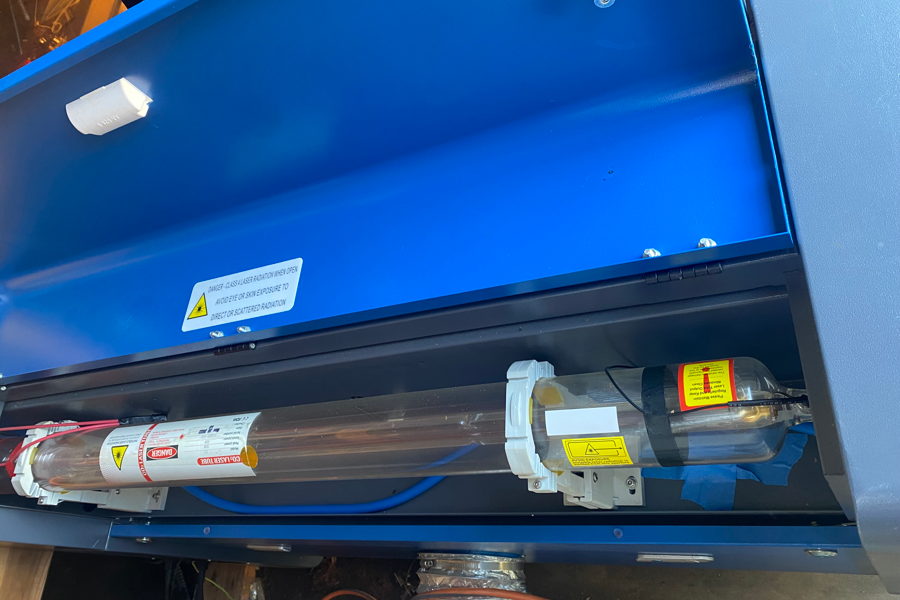
Omtech Laser Tube 100 watt
Troubleshooting Common Issues
- Inconsistent Cuts: Check the alignment and focus of the laser head. Ensure the material is flat and securely positioned on the bed. When you are getting a double line its usually from an alignment issue, the beam is hitting a sidewall somewhere causing doubling issues.
- Laser Not Firing: Ensure all connections are secure and the power supply is functioning correctly. Check for any software or driver issues.
- Poor Engraving Quality: Clean the lenses and mirrors, and check the calibration of the laser head. Adjust the speed and power settings in the software. Make sure you use a microfiber cloth to clean your laser parts. if you are getting an uneven engraving it might be because your bed is mis aligned.
Conclusion
Setting up your first laser cutting machine involves careful attention to detail and adherence to safety protocols. Proper setup and maintenance will ensure your machine operates efficiently and produces high-quality cuts and engravings.