
The Ultimate Guide to CO₂ Laser Engraver Maintenance
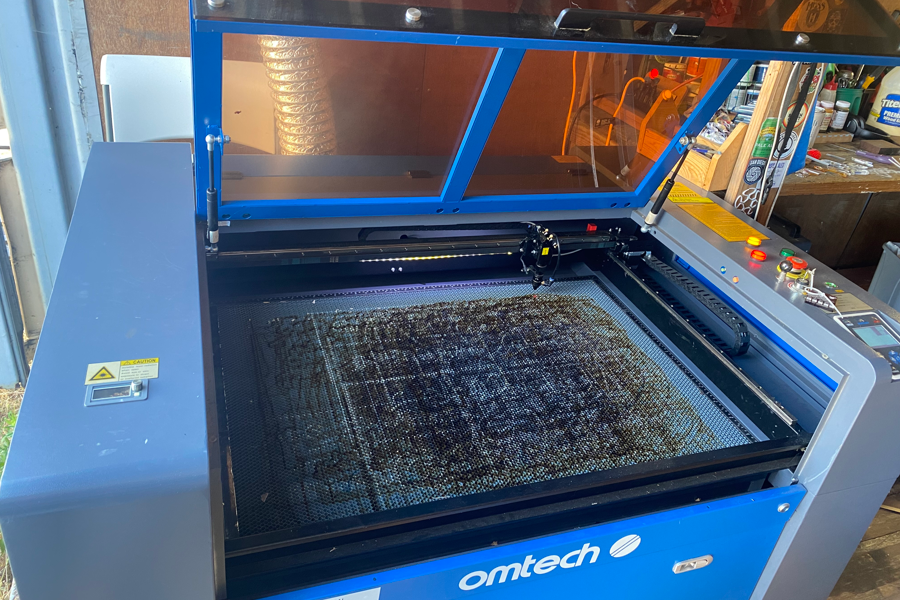
Omtech 100 watt Laser Cutter
THE ULTIMATE GUIDE TO CO2 LASER ENGRAVER MAINTENANCE
join our subreddit https://www.reddit.com/r/lasereducation/
Essential Tips for Cleaning & Maintaining Your Laser Engraving Machine
Just like any other machinery, your CO₂ laser engraver is susceptible to breakdowns, often at the least convenient times. Preventive maintenance is key to minimizing these interruptions and ensuring your laser engraver operates smoothly. As Benjamin Franklin aptly noted, "An ounce of prevention is worth a pound of cure."
In this comprehensive guide, we’ll cover essential preventive maintenance tasks to keep your CO₂ laser engraver in top condition. As one user wisely mentioned, "If you take care of your machine, it will take care of you."
CO₂ Laser Engraver Maintenance Checklist
Below, we outline the necessary preventive maintenance activities for your CO₂ laser engraver:
- Maintaining the Water Cooling System
- General Cleaning of the Machine
- Cleaning the Optical System
- Aligning the Laser Beam Mirrors
- Lubricating the Machine
Recommended Cleaning Frequency for Your Laser Engraver
To ensure your laser engraver remains in peak condition, OMTech suggests the following maintenance schedule:
Daily:
- Clean the work table
- Empty the debris/crumb tray or clear debris from the bottom if no tray is present
- Check and clean mirror 3 for dirt/grime and alignment
- Check and clean the laser focus lens for dirt/grime
- Inspect the water in the cooling system for dirt/debris
Weekly:
- Check and clean mirrors 1 and 2 for dirt/grime and alignment
- Clean the exhaust system (if needed)
- Inspect wiring for loose connections
Bi-Weekly (Every 2 Weeks):
- Clean and lubricate guide rails and bed height screws
Monthly:
- Clean the water cooling system
- Check and clean the air assist system
Maintaining the Laser Engraver’s Water Cooling System
Important: Before performing any maintenance on the water cooling system, ensure the laser water chiller or water pump is unplugged.
Your laser tube requires a steady flow of cool distilled water to prevent overheating and potential damage. Never use the laser when the water temperature exceeds 75°F (24°C) or drops below 50°F (10°C) to avoid cracking or shattering the laser tube.
Before each use, visually inspect the water in the reservoir and laser tube for dirt or debris. If found, clean the cooling system before using the laser.
How to Clean a Water Pump Cooling System
Note: Cleaning of the water pump system even if the water appears clean is a good practice.
- Redirect the outlet hose to a separate clean bucket and run the pump until all water is expelled from the laser tube and tubing. Turn off the pump afterward.
- Remove and rinse the water pump with clean distilled water. Ensure the pump and its lines are free from dirt/debris. Replace any lines that cannot be cleaned.
- Refill the bucket/reservoir with at least 2 gallons (7.5L) of clean distilled water. Note: Use distilled water only; do not use tap water, de-ionized water, or add chemicals like bleach or anti-freeze.
- Reattach the outlet hose and bucket lid to prevent dirt from entering the system. Plug in the pump and ensure water flows through the laser tube. Check for leaks at all connection points.
- Inspect the laser tube for bubbles. If bubbles persist, turn the pump off and on a few times or elevate the water reservoir above the laser tube while running.
How to Clean a Laser Water Chiller System
Note: Cleaning instructions may vary by brand; refer to your chiller’s user manual.
- Place a clean bucket under the drain port, remove the drain cap, and allow the water to flow out. Remove the fill port cap to aid draining. Ensure nearly all water is removed from the laser tube.
- Replace the drain port cap. Clean the side air filter if present, and blow dust from air ports and fans with compressed air.
- Refill the chiller with clean distilled water to the recommended level (about 1.6 gallons (6L)). Note: Use distilled water only; do not use tap water, de-ionized water, or add chemicals.
- Replace the fill port cap, plug in the chiller, and turn it on. Ensure water flows through the laser tube and check for leaks.
- Inspect the laser tube for bubbles. If bubbles persist, turn the chiller off and on a few times or elevate the chiller above the laser tube while running.
General Cleaning of the Laser Engraver
- Empty the debris/crumb tray daily or clear debris from the bottom if no tray is present. Warning: Accumulated debris can be a fire hazard.
- Clean viewing windows with a mild cleaner and lens cloth. Warning: Do not use paper towels as they can scratch the acrylic.
- Wipe down the machine’s interior and exterior with window cleaner and paper towels.
- If needed, remove the honeycomb bed and clean with a degreaser/oven cleaner to remove buildup, then rinse with clean water.
- Regularly dust the laser tube using compressed air or a soft cloth, and clean it after it has fully cooled.
- Clean the exhaust fan and ducts, including any inline exhaust fans.
Cleaning the Optics: Mirrors & Focus Lens
Cleaning Mirrors in Place
Always clean laser mirrors after use. Inspect each of the three mirrors for dirt, grime, or haze. Use a flashlight to spot dust particles and clean them without removing the mirrors to avoid misalignment.
- Prepare a lens cleaning tissue or cloth. Use denatured alcohol, isopropyl alcohol, or a lens cleaning solution.
- Clean each mirror in a circular motion.
- Ensure mirrors are free of streaks and dirt, with a clear reflection.
Pro Tip: Clean gently to avoid misaligning the mirrors.
Removing and Cleaning Mirrors
Occasionally, remove and deep clean the mirrors, knowing you’ll need to realign them afterward.
- Unscrew the mirror retaining ring and carefully remove the mirror using lens cleaning tissue.
- Clean each mirror in a circular motion.
- Ensure mirrors are spotless and reflective.
- Reinstall the mirror and tighten the retaining ring securely but not excessively.
Cleaning the Laser Focus Lens
- Remove the laser head nozzle/tube.
- Unscrew the retaining ring and drop the lens and O-ring onto a clean tissue.
- Clean both sides of the lens in a circular motion.
- Reinstall the lens with the convex side facing up, replace the O-ring, and screw in the retaining ring securely.
- Reassemble the laser head nozzle/tube.
After cleaning, check the laser beam alignment. Follow the steps in the next section for guidance.
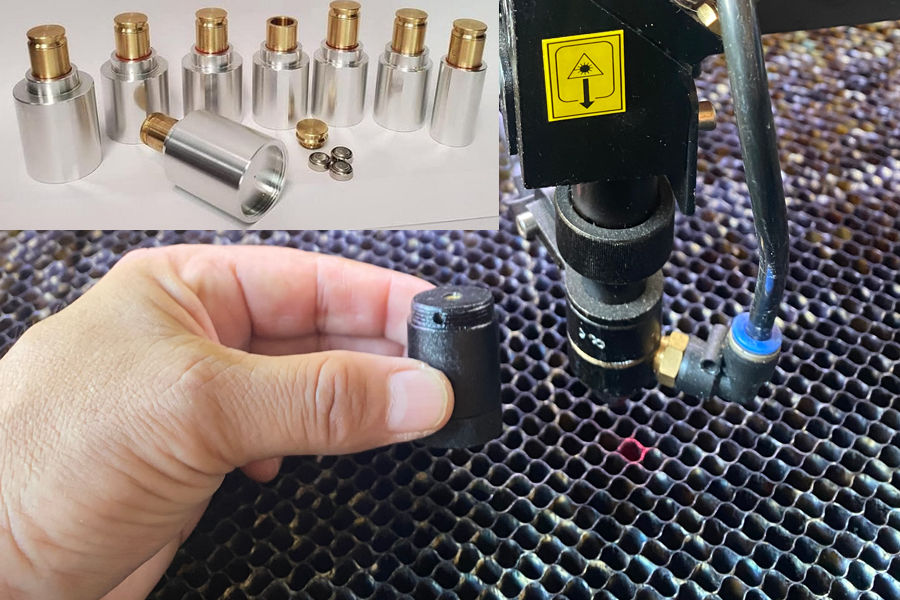
Laser cutter alignment tool used to align your laser engraver
Aligning the CO₂ Laser Beam Mirrors
Regularly check laser beam alignment, especially if you notice changes in performance. Misaligned mirrors can affect the cutting and engraving quality. You could find more information on aligning your laser here: https://wellingtonjr.io/the-ultimate-guide-to-the-color-fill-laser-cut-process-creating-stunning-multi-color-laser-projects-copy-2-copy/
Lubricating the Laser Engraver
Every two weeks, clean and re-grease the X-axis and Y-axis guide rails and the bed screws.
How to Lubricate Gantry Guide Rails
- Wipe away old grease from the X and Y axis guide rails and bed screws with disposable cloths.
- Apply a small amount of white lithium grease to each guide rail and screw. Pro Tip: Use minimal grease to avoid excess cleanup later.
- Move the gantry and work bed to distribute the grease evenly.
- Inspect the belts for wear and replace them if necessary.
Conclusion
Regular preventive maintenance is crucial for the longevity and optimal performance of your CO₂ laser engraver. By following this maintenance schedule, you can avoid costly repairs and downtime, ensuring your machine remains reliable and efficient. Remember, investing time in maintenance will save you time and money in the long run.


