
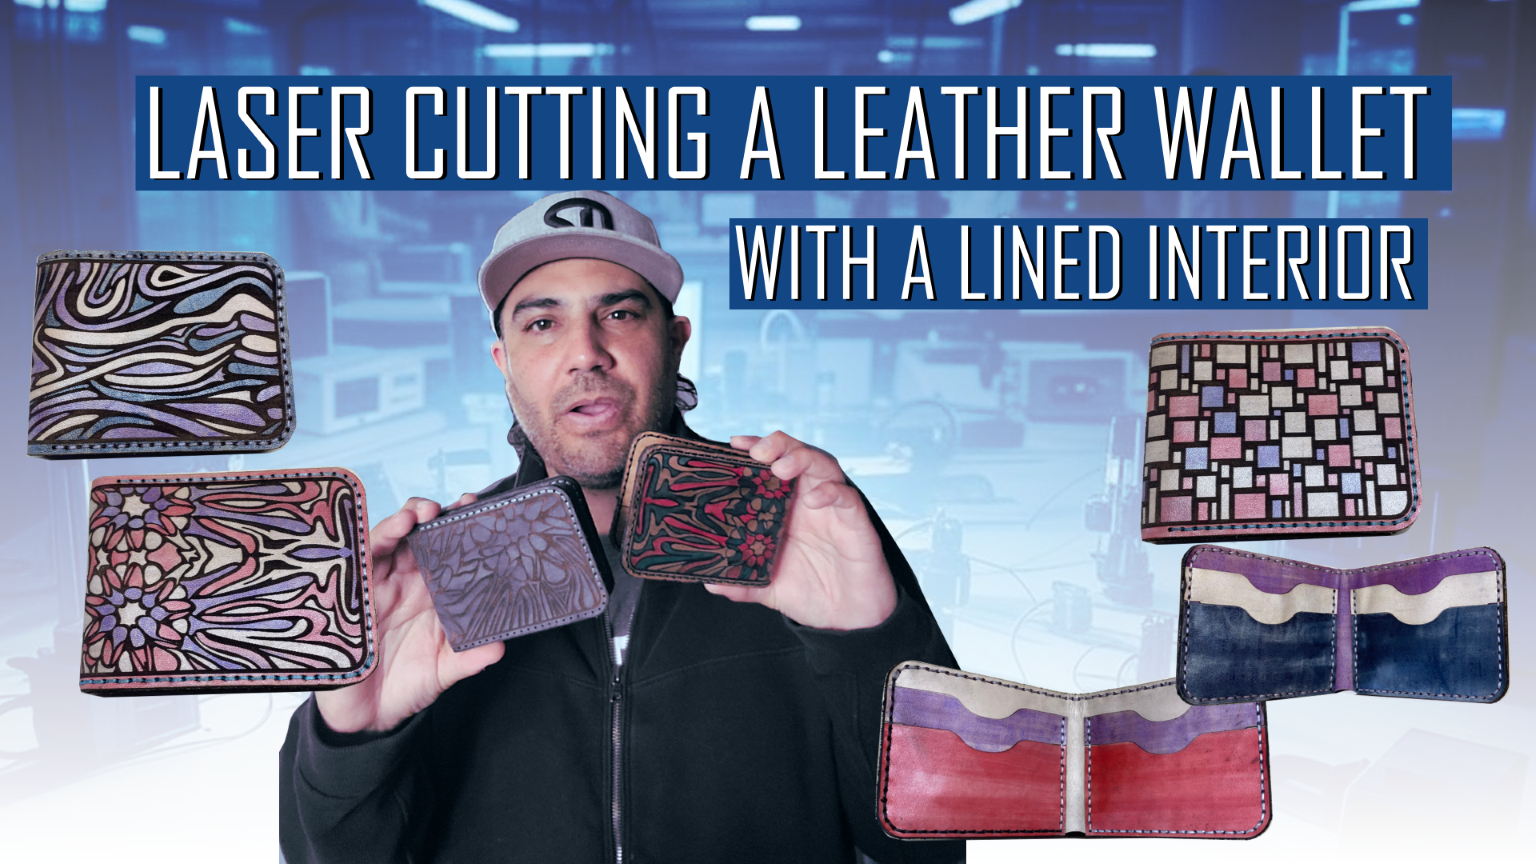
Laser Cutting Leather Wallet with a Lined Interior – Free Template
LASER CUTTING A LEATHER WALLET WITH LINED INTERIOR - FREE TEMPLATE
laser cutting a leather wallet-blog
Materials and Tools
- Laser cutter
- 4-5 oz veg tan leather (outside of the wallet) https://amzn.to/4bGWYZx
- 1-2 oz calf veg tan leather (inside pockets) https://amzn.to/3LnlGDr
- Leather glue https://amzn.to/3LiR4CT
- Duck canvas (for interior lining) https://amzn.to/3xPgFQV
- Leather needle https://amzn.to/3zAbwwx
- Waxed thread https://amzn.to/3y4Qq90
- Leather sealer (matte finish preferred) https://amzn.to/3LlmlVV
- Leather dyes (colors of your choice) https://amzn.to/3WiV9xi
- Transfer tape https://amzn.to/4fd1fqD
- LightBurn software (or any laser cutting software)
- Laser Cut Leather Wallet PDF https://wellingtonjr.io/product/bi-fold-wallet-template/
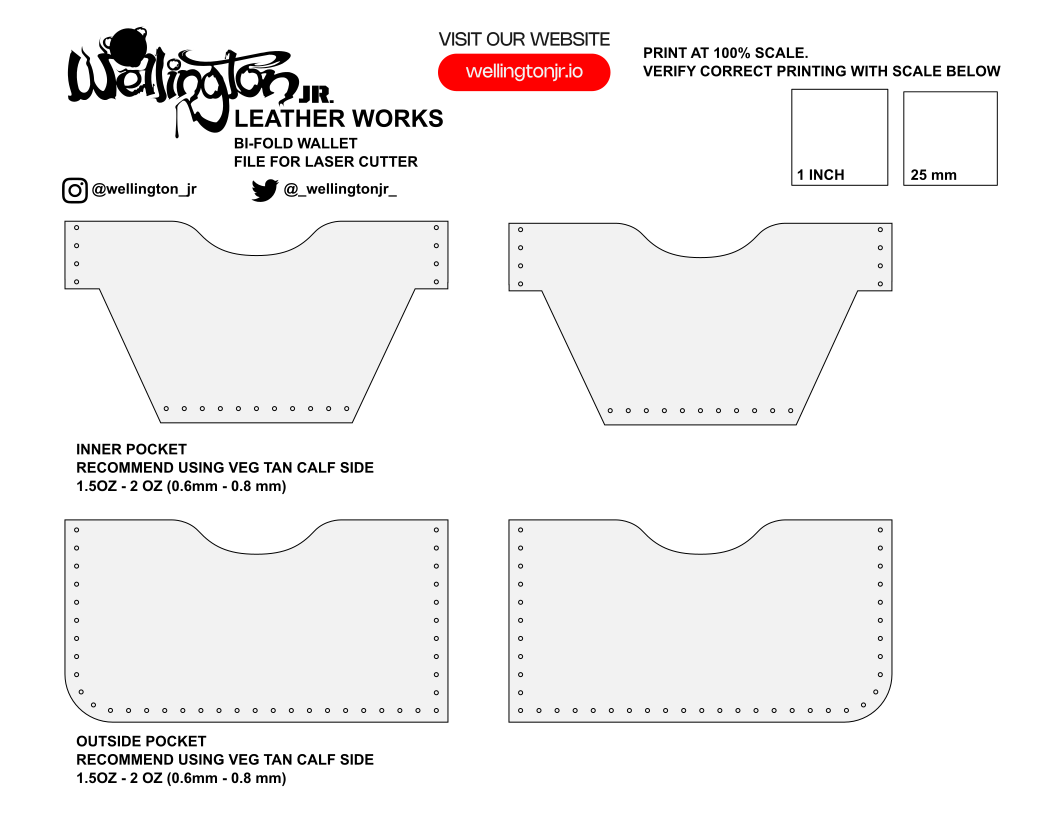
Leather wallet pattern for use with laser cutter
Step 1: Create Your Design
First, you need to create your leather design for the wallet. For this project, we'll use the laser cut leather wallet PDF that is linked above and I have created a design which I will engrave onto the leather. This design is a swirly pattern design that I offer in my shop. I created this design in Inkscape which is a free vector program that i use for most of my projects.
Step 2: Prepare Your Leather
Prepare your leather by gluing the duck canvass fabric to the backside of the leather. I only need to add this fabric to the outside of the wallet (4-5 oz leather) and the base piece of the inside of the leather wallet (1-2 oz. leather). These pieces are clearly indicated in the linked PDF. Use a light layer of leather glue and spread the glue out with a brush but I make sure not to put to much glue. Don't put so much glue that it seeps through the duck canvass material. Duck canvas is a great choice for the lining, but make sure whatever material you choose for the interior lining that it's a laser-safe fabric.
Next, cover the front of the leather with transfer tape to protect it from dust and smoke during the laser cutting process. Only prepare enough material for what you are going to cut today because you don't want the transfer tape to sit on the leather for long period of time, this will ruin your material.
Step 3: Laser Cut and Engrave the Wallet
Load your design into LightBurn or your preferred laser cutting software, then load the pattern into your laser cutter.
For engraving, use a light power setting (about 30% power and 200 mm/sec worked well for this project) to ensure you don’t engrave too deep. Cut the wallet pattern, including the holes for hand sewing.
Do the same for both types of calf leather, lined and unlined pockets. When the leather just comes out of the laser it will have residue all over it that you will need the clean off before you proceed make sure to clean edges. Remove the transfer tape promptly after cutting.
Step 4: Paint and Dye the Leather
Now it's time to dye the leather. You can choose to dye the entire wallet one color or use multiple colors for a more intricate design. If you are doing one color dying its great to get the large sponges on a stick which will cover large areas evenly. For this project I have decided to do a multi-color dye job. For the multi-color wallets I use a combination of brushes, small sponges or sometime even Q-tips. After dyeing, apply a matte leather sealant to protect the leather and keep the colors vibrant. You have a lot of color options for leather dye so make sure you check the links above.
Step 5: Sew the Wallet Together
Now that your leather pieces are dyed and sealed, it's time to sew the wallet together. Use a leather needle and waxed thread for durability. There are various sewing techniques you can use, such as the double needle technique, which provides a strong and professional finish. There are also leather clamps you could get to clamp down the wallets as you are sewing. Try a bunch of techniques to see which ones work for you. I usually use a single needle method and only use the leather clamps on bigger purses or other larger projects.
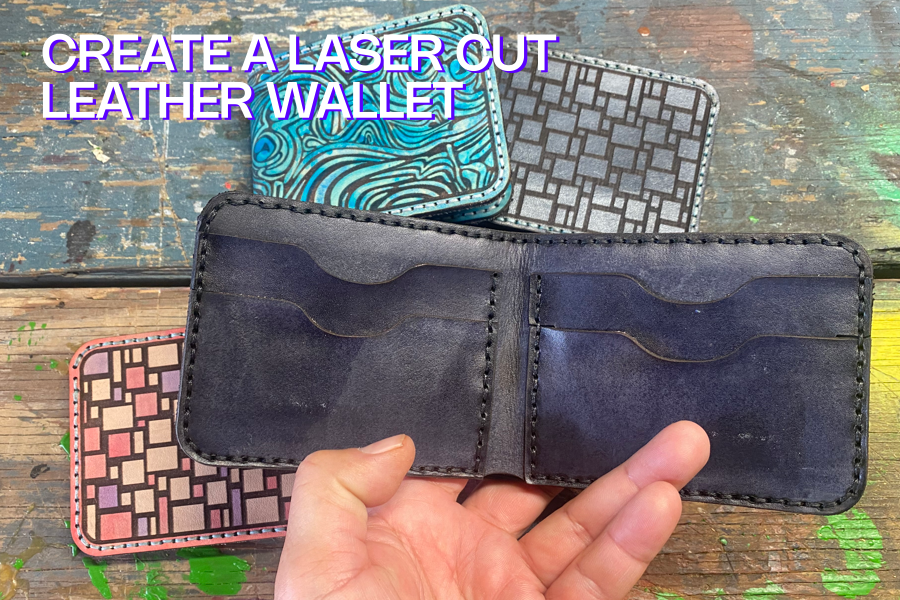
Crafting a laser cut leather wallet
Step 6: Finish the Edges
To give your wallet a professional look, it's important to finish the edges of the leather. Here’s how:
- Sand the Edges: Smooth the edges with fine-grit sandpaper. This prepares the leather for burnishing and ensures an even finish. I just give the edges a quick soft sanding usually the leather edges come out pretty good right from a laser cutter.
- Burnish the Edges: Apply a small amount of gum tragacanth or beeswax to the edges and rub with a burnishing tool. Use a quick, back-and-forth motion to create friction, which smooths and darkens the edges. Tip: There are other materials that can be good for this purpose like burts bees lip balm for edging and the duct canvas to rub the leather edges used as a burnishing tool
- Repeat as Necessary: For a smoother finish, repeat the sanding and burnishing steps a few times until you achieve the desired look. You could get really polished looks if you keep going.
Final Thoughts
Keep up with all the new laser information or ask me any questions that you have about lasers or making these wallets. Happy laser Cutting.


